Toiling away for months on a project, saving it on your PC, going for a vacation for a couple of days and coming back only to see a virus or something similar has corrupted your machine. To make matters worse, the data corruption or virus and malware infections can sometimes wipe the slate clean. Sounds familiar? If yes, then you should create system image backup of your Windows system for a worry free vacation from next time onwards.
With windows 10 becoming increasingly popular, here I’m providing the process of creating a full system image backup in Windows 10. However, this same procedure can be used to create system image backup in windows 7 and 8.1 as well.
Note: it is recommended that you should create system image backup of Windows on an external hard drive. If you don’t have an external hard drive then you can simply use one of your partitions. Just make sure that you have enough space to create system image backup of your system.
Create System Image Backup in Windows 10
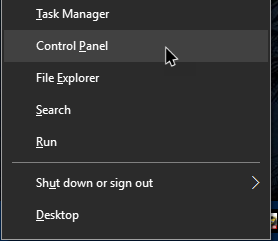
To create system image backup, go to the ‘Start’ button on your desktop, right-click on it to open the Power User menu. Here, select the option “Control Panel.”
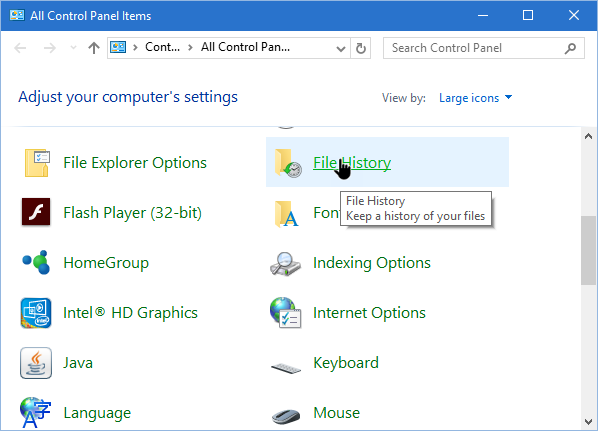
Once the Control Panel has been opened, click on the “File History” option. Make sure that the Control Panel view has been set to “Large” or “Small” icons. Alternatively, you can type ‘File History’ in the start menu search field, and open the File History application.
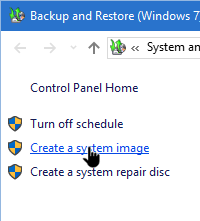
When the File History window opens, click on the ‘System Image Backup’ link appearing in the bottom-left corner of the window.

In the next window, click on Create system image link appearing on the left-hand side of the window.
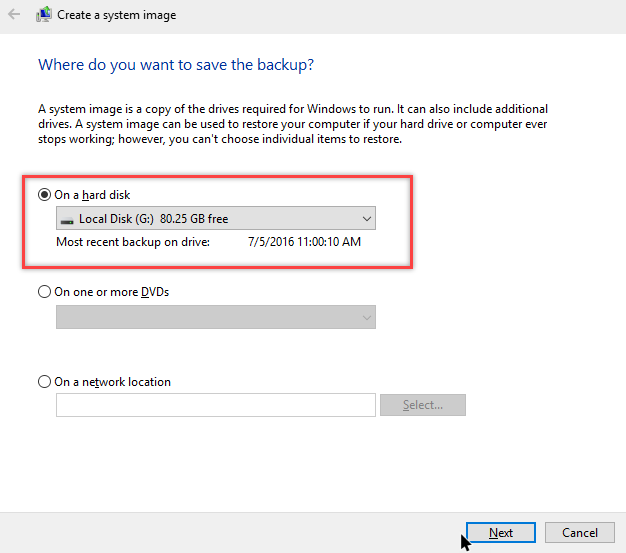
Here, select the option “On a hard disk” and choose a partition of your choice from the drop-down menu. However, it is recommended that you use an external hard disk. It is much safer in the event of hard disk failure in your system. Once you are done selecting the drive, click “Next” to continue.
Note: if you have a network location where you can save your system image backup then select the radio button “On a network location” and then choose the network location where you want to create system image backup.
By default, Windows will automatically select all the system partitions. Simply click on the button “Next” to continue.
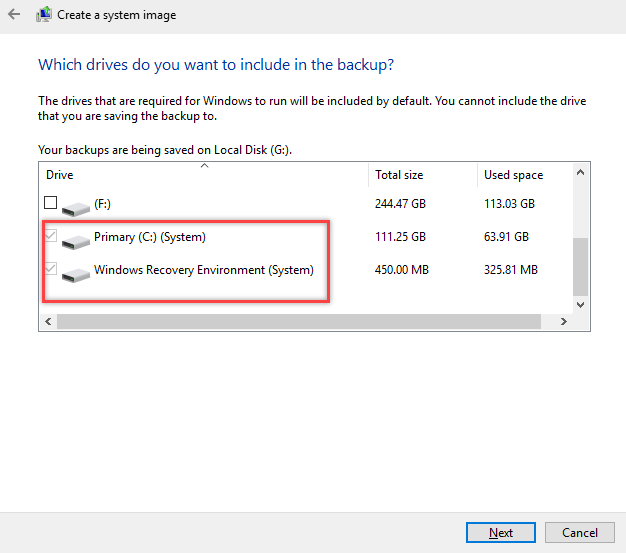
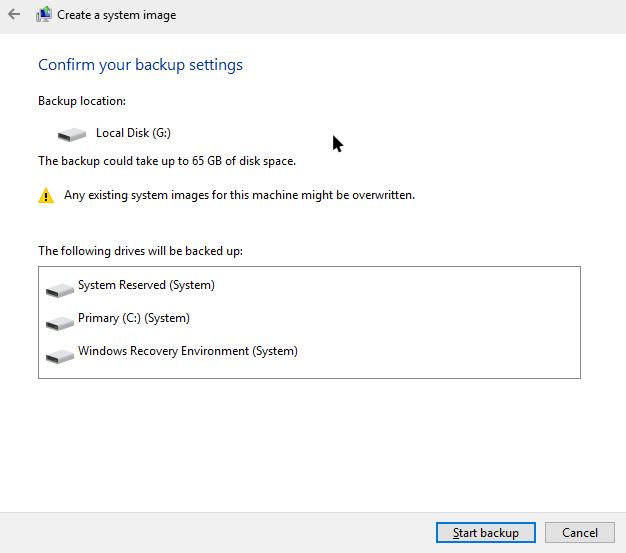
In the next window, review all the settings listed and click “Start Backup” button. The system will now start to create system image backup of your system.
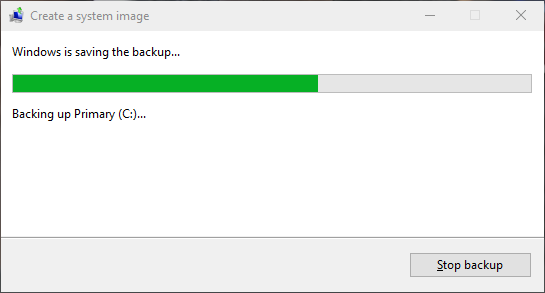
Once the backup has completed, you can close the wizard and unplug your external drive (if you’ve used one). You now have the full system backup of your windows 10 machine. Windows might prompt you to create a system repair disk. So, go ahead and follow the on-screen instructions. The system repair disk helps you boot into your system even when your system is corrupted or not bootable.
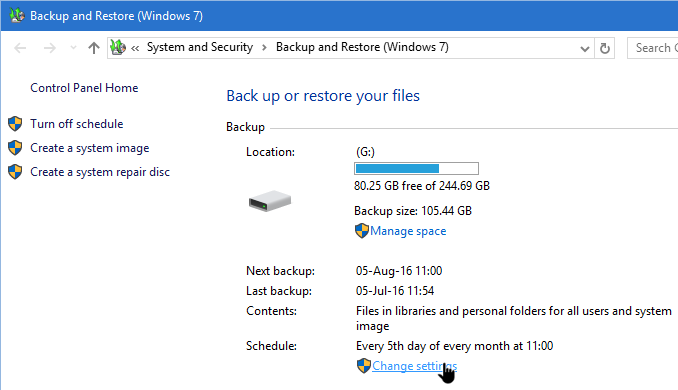
That’s all there is to do and it is that simple to create system image backup in Windows 10. Generally, Windows automatically backs up your system on a weekly basis. If you want to change the schedule, simply click on the link “Change Settings” in the Backup and Restore window.
Hope that helps and do let me know if you found the step by step guide useful. Please feel free to comment in case I missed anything or if you have any other better solution with in Windows.
